TABLE OF CONTENTS
-
How to Import Chart of Accounts, Classes, Customers, Billable Fields, and Projects from QuickBooks
-
How to Deactivate Chart of Accounts, Classes, Customers, and Projects in Precoro
Enable the Necessary Settings in QuickBooks
- Classes and Charts of Accounts
- Customers and Projects.
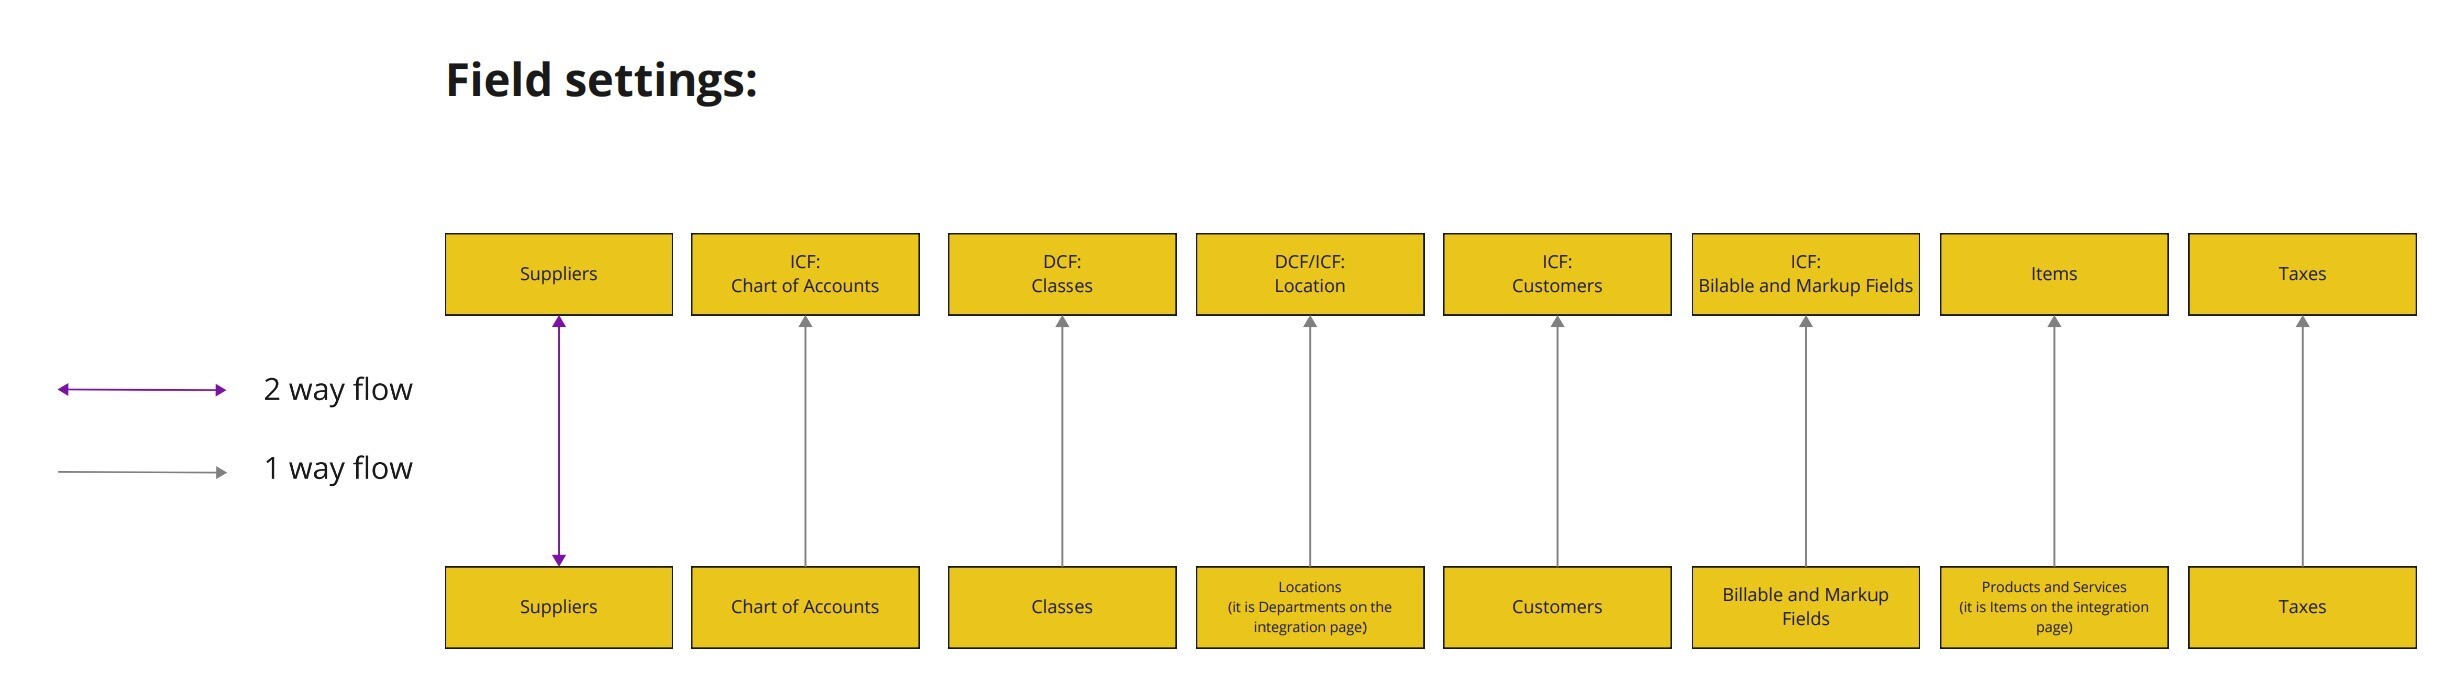
Here's how the data flows between Precoro and QuickBooks Online:
How to Import Chart of Accounts, Classes, Customers, Billable Fields, and Projects from QuickBooks
These lists can be imported to Precoro as Custom Fields for Items and, consequently, added to each item line in the documents.
1. On the QuickBooks integration page, scroll to Step 3: Import lists and settings. Here you will find a few buttons for each type. Click the needed button to open the list of the options available for the import.
2. Choose the necessary options by marking them.
3. Click the Import button below.
All the imported options are added to the Custom Fields for Items.
You can also optimize your work with QuickBooks integration by using the Search functionality available in the following import options:
- Chart of Accounts
-
Import Locations
-
Import Classes
-
Import Customers.
Lists and Settings Mapping in Both Systems
- Chart of Accounts:
In Precoro, you will find the imported options in the automatically created directory QuickBooks Chart of Accounts in the Items Customs Fields.
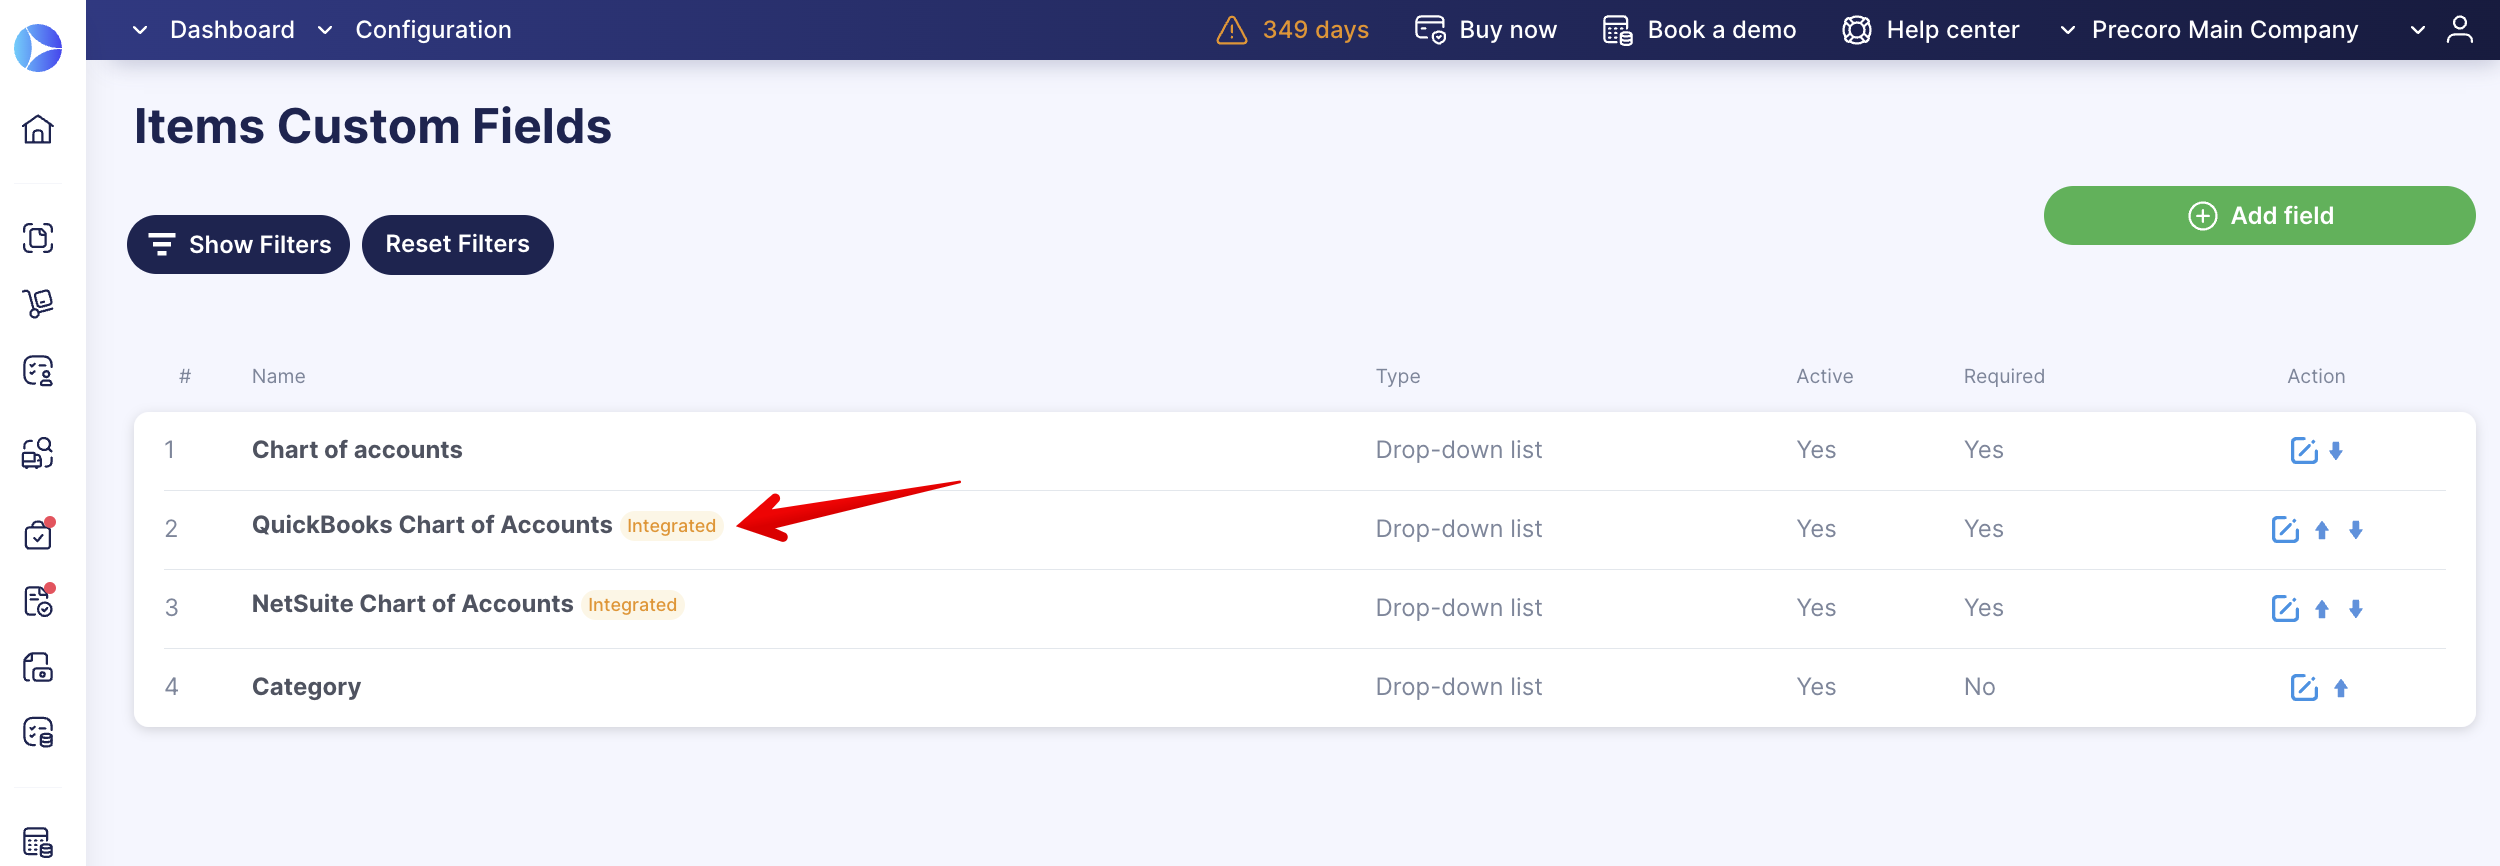
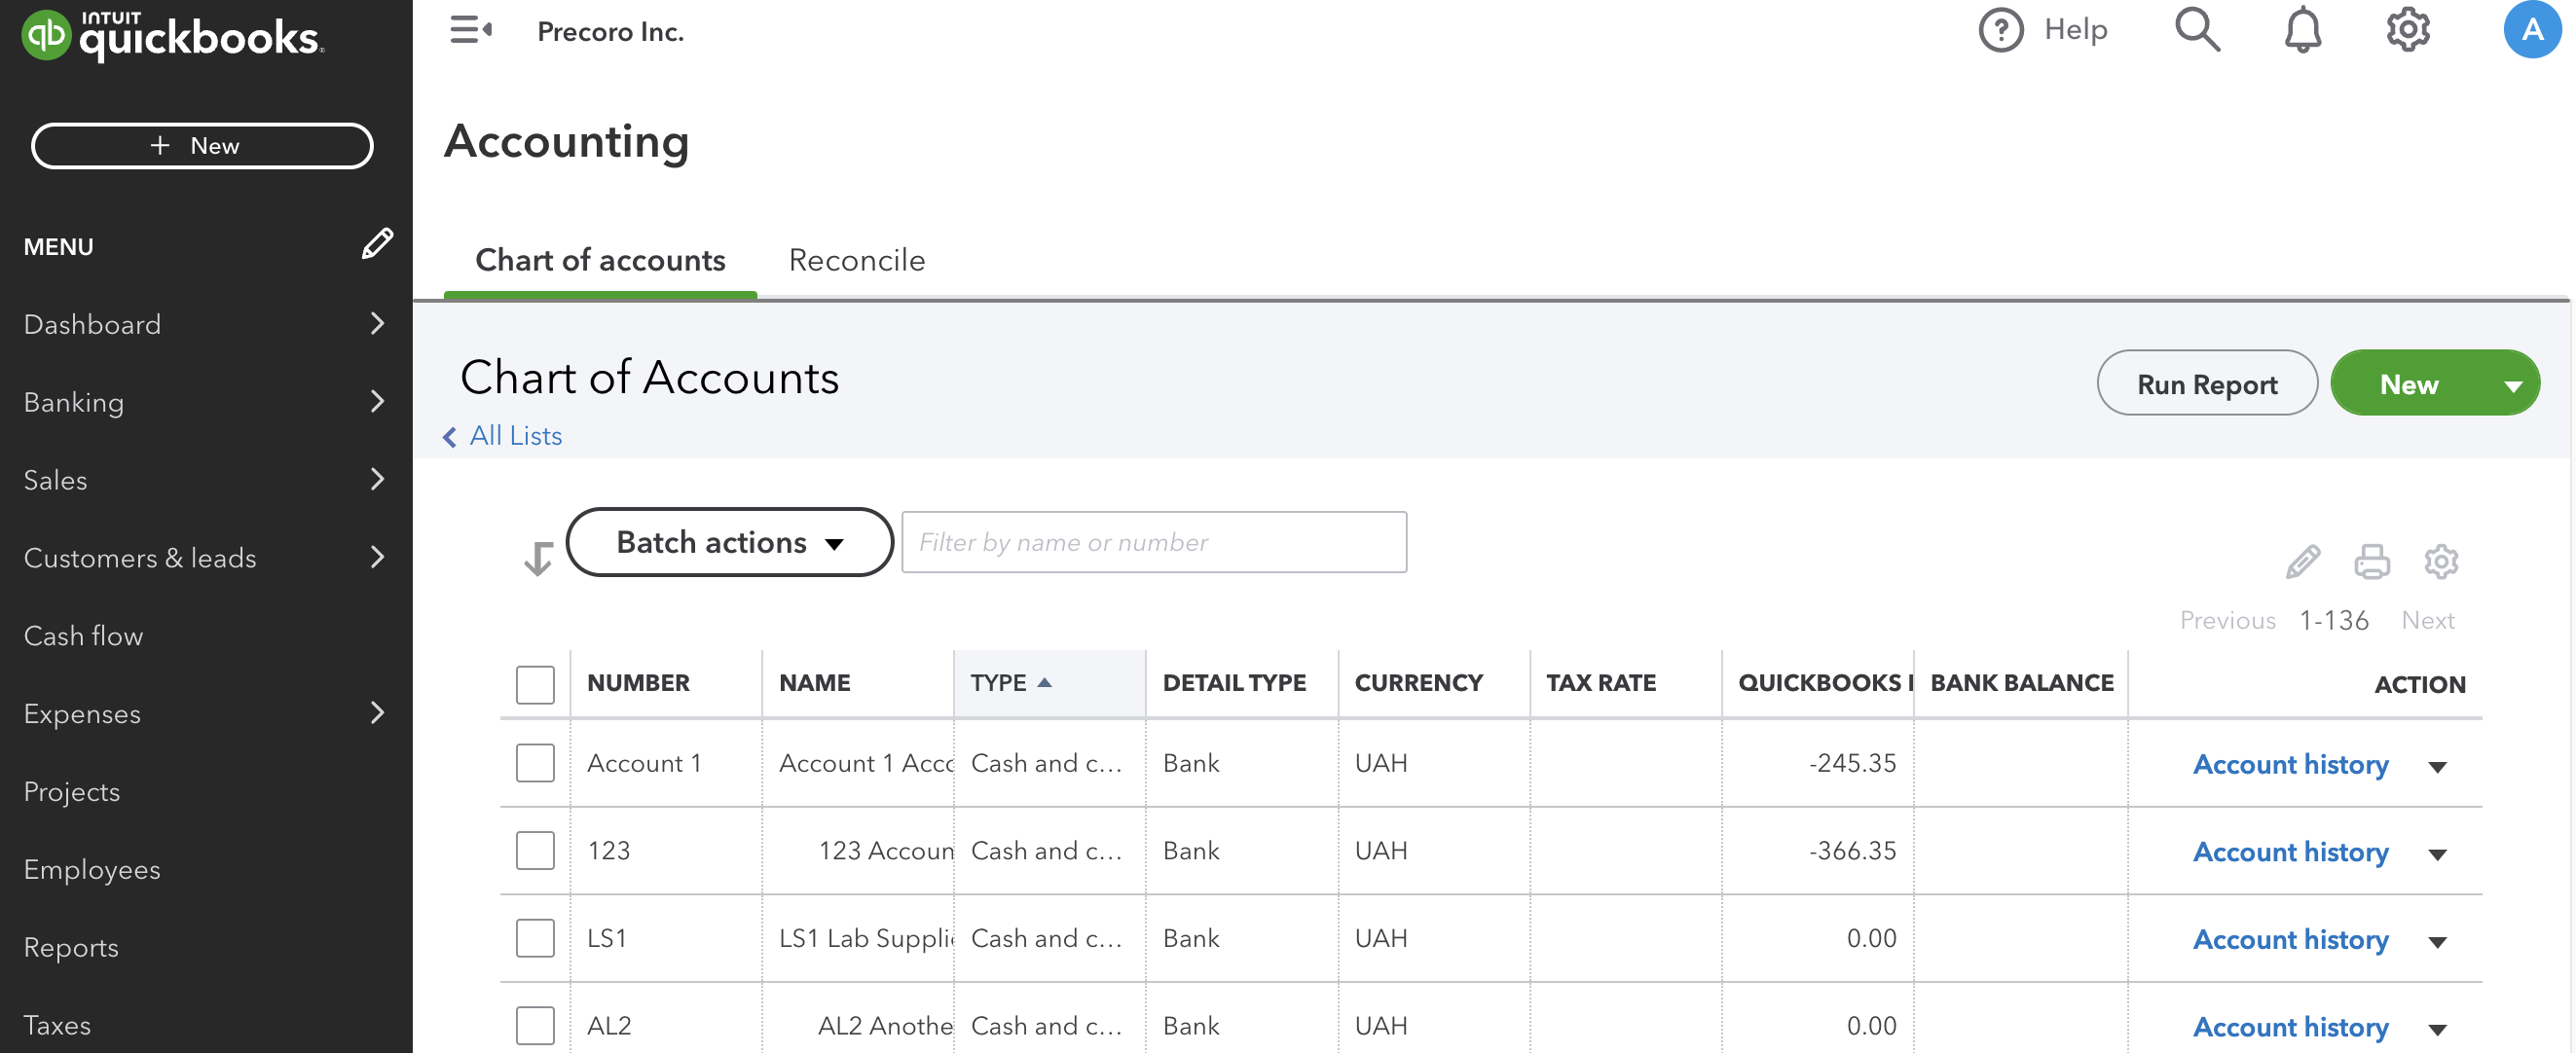
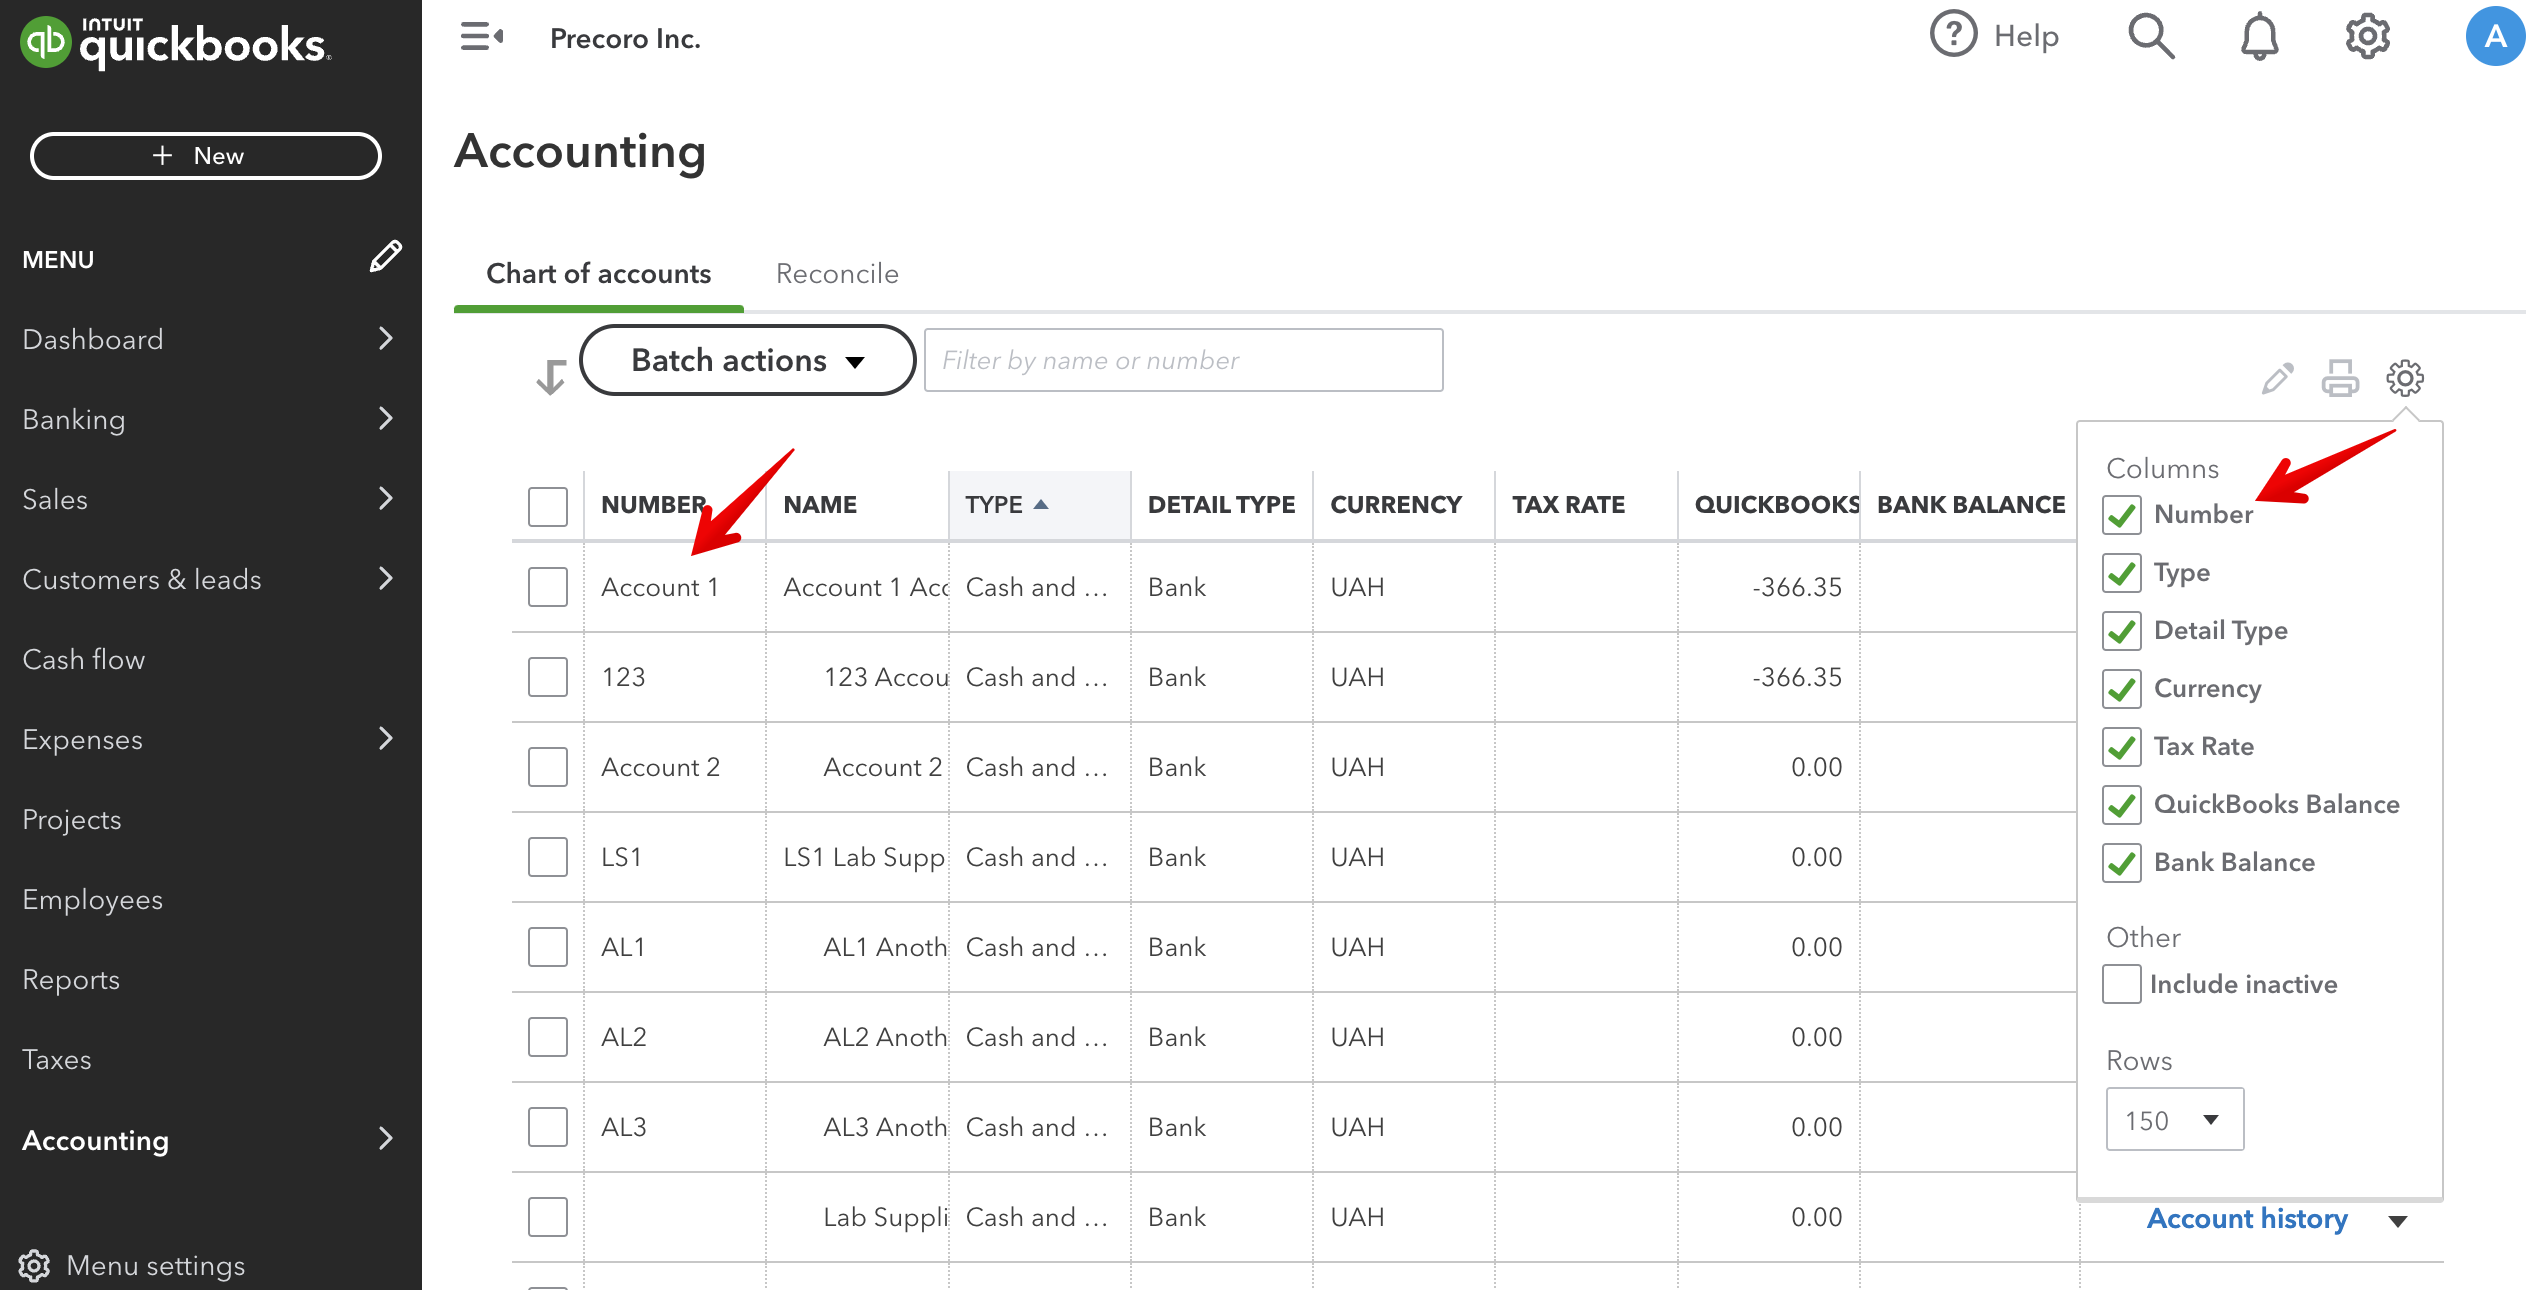
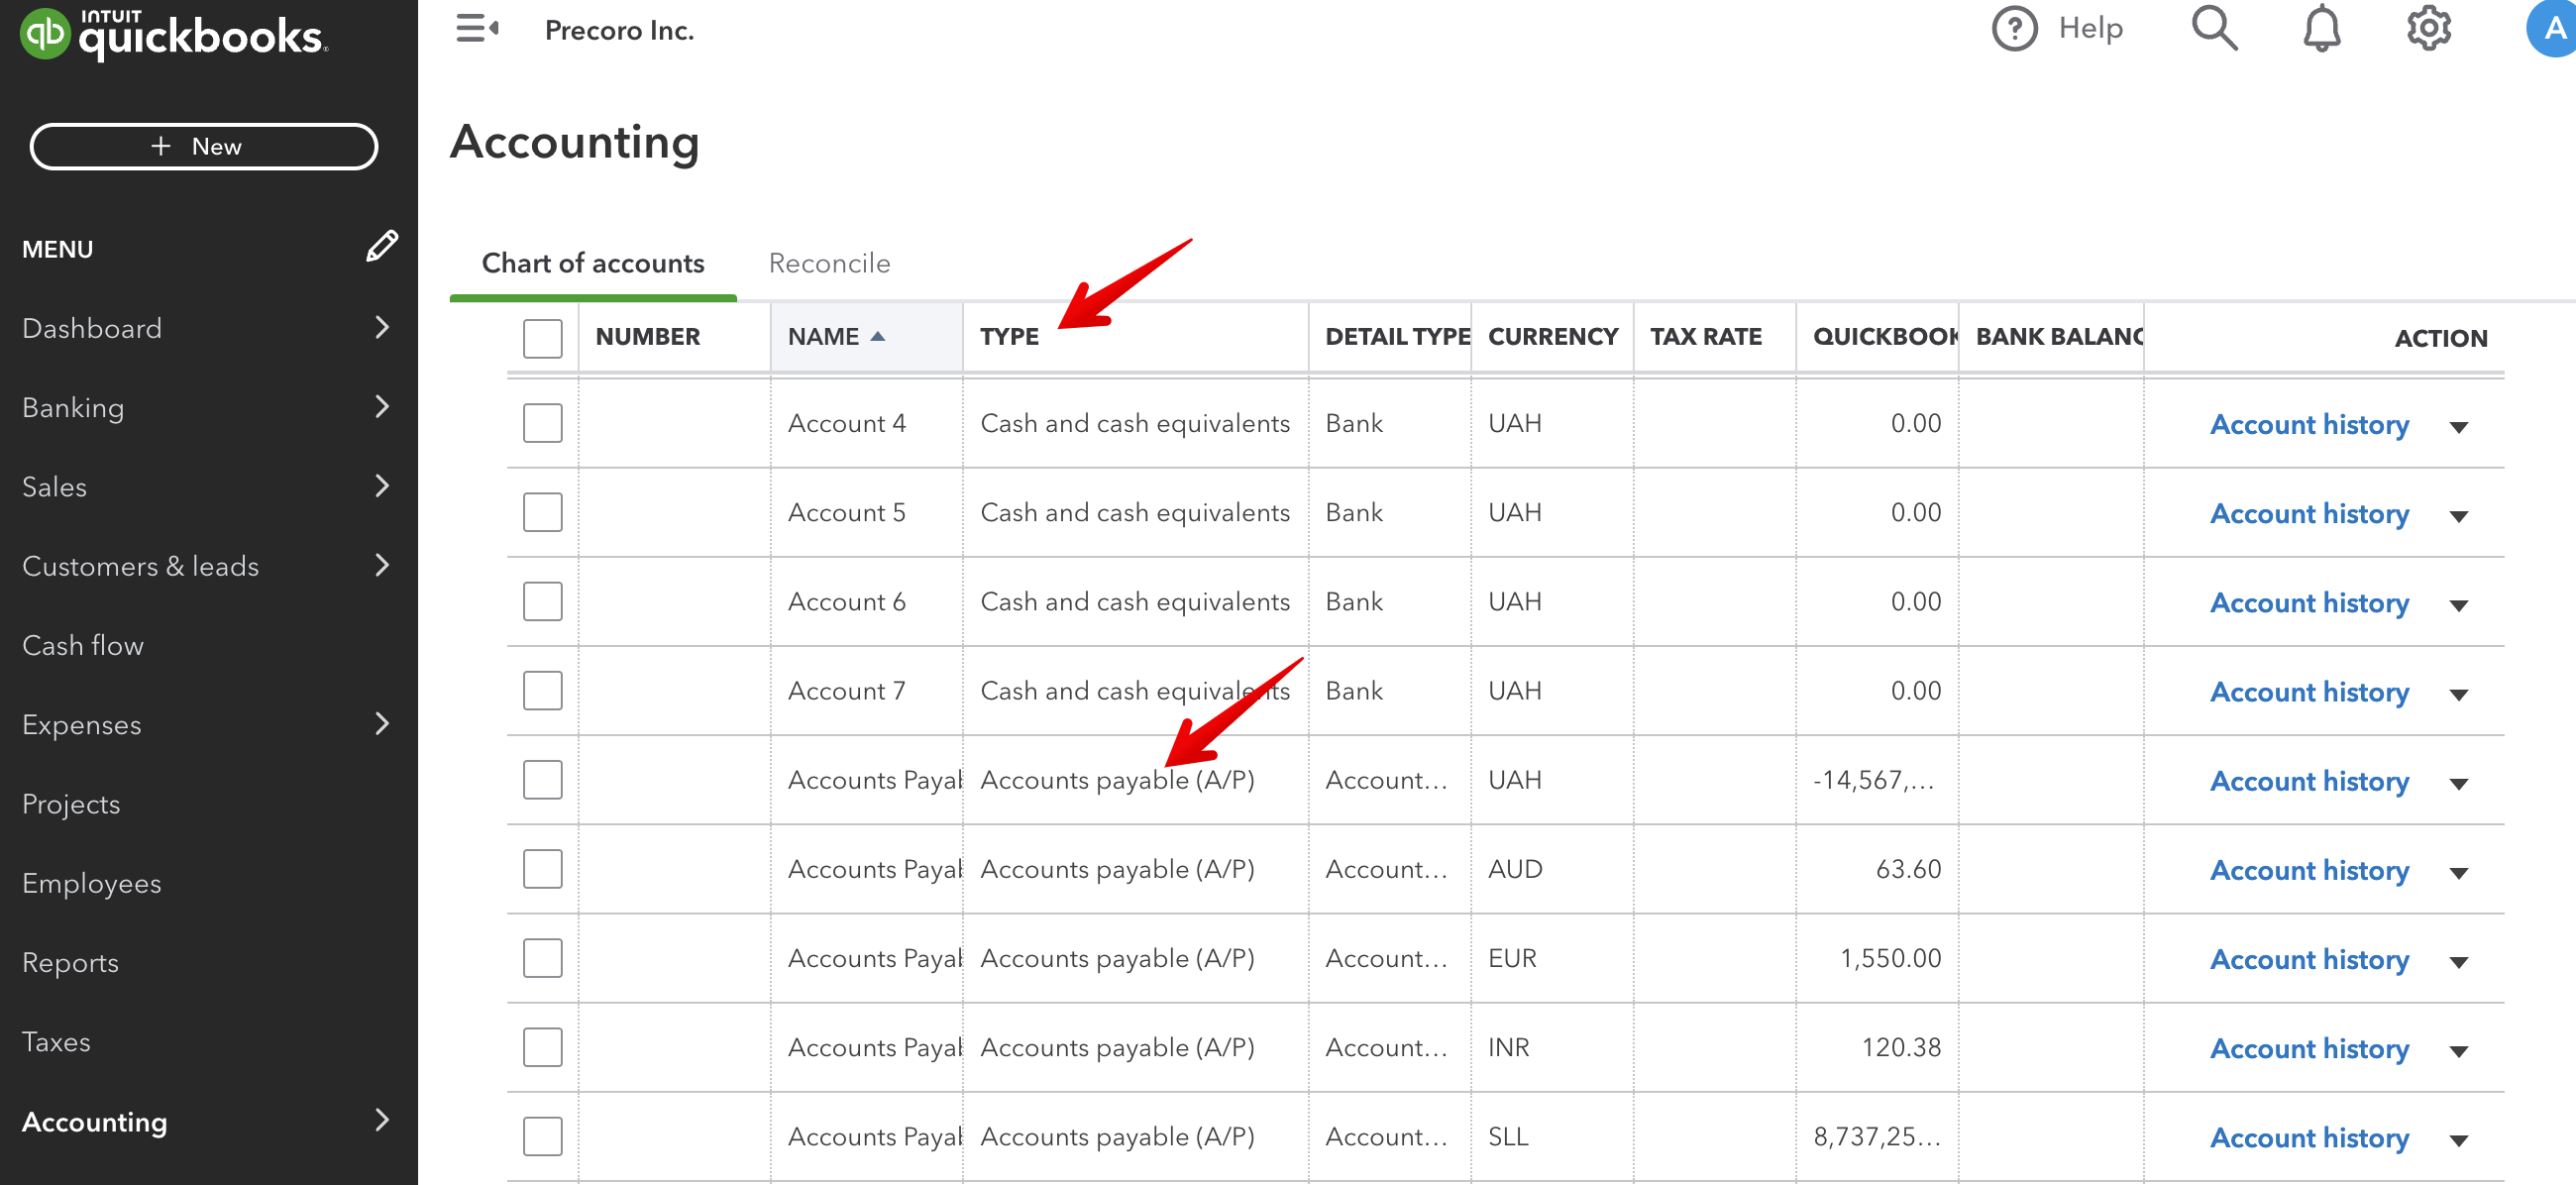
In QuickBooks, the Chart of Accounts list of options can be found on the Accounting page.
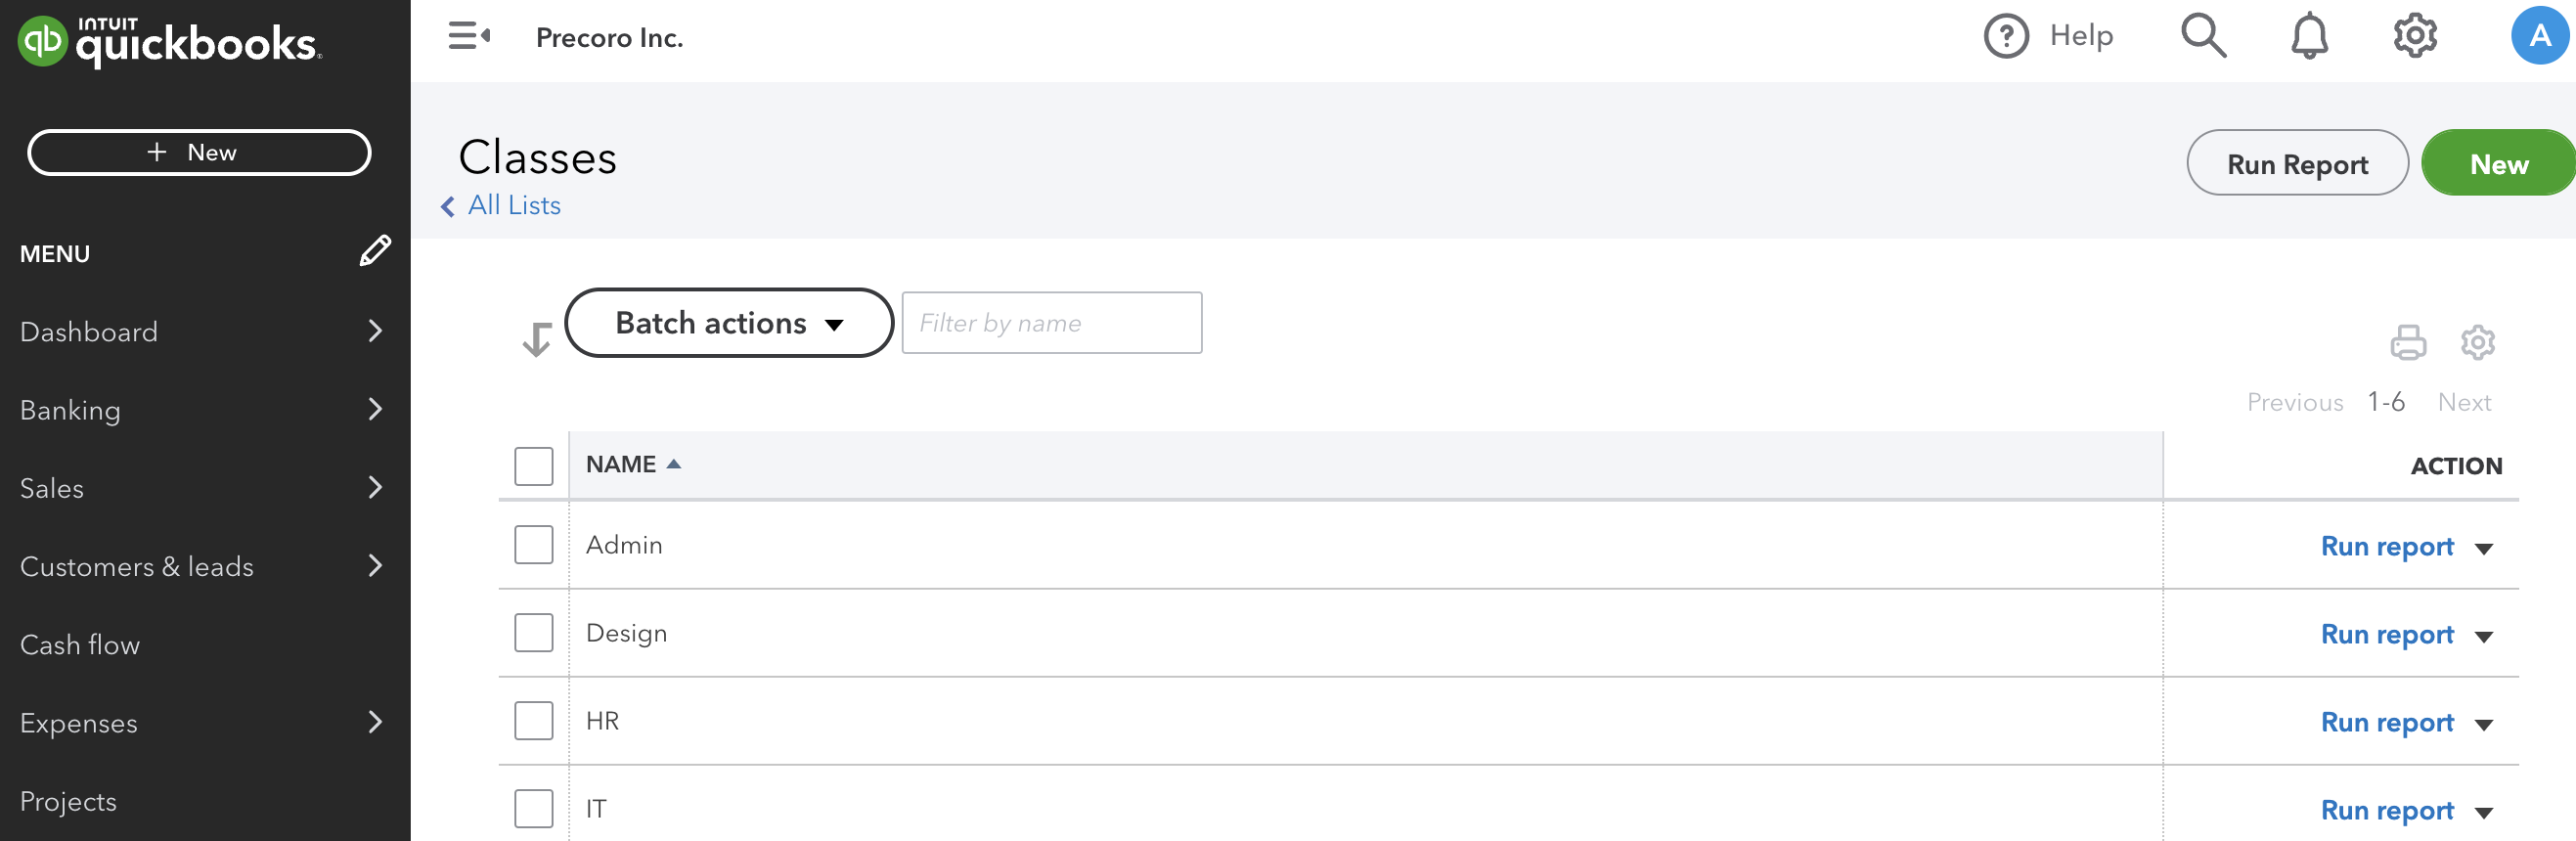
- Classes:
In Precoro, you will find the imported options in the automatically created directory QuickBooks Classes in the Custom Fields for Documents.
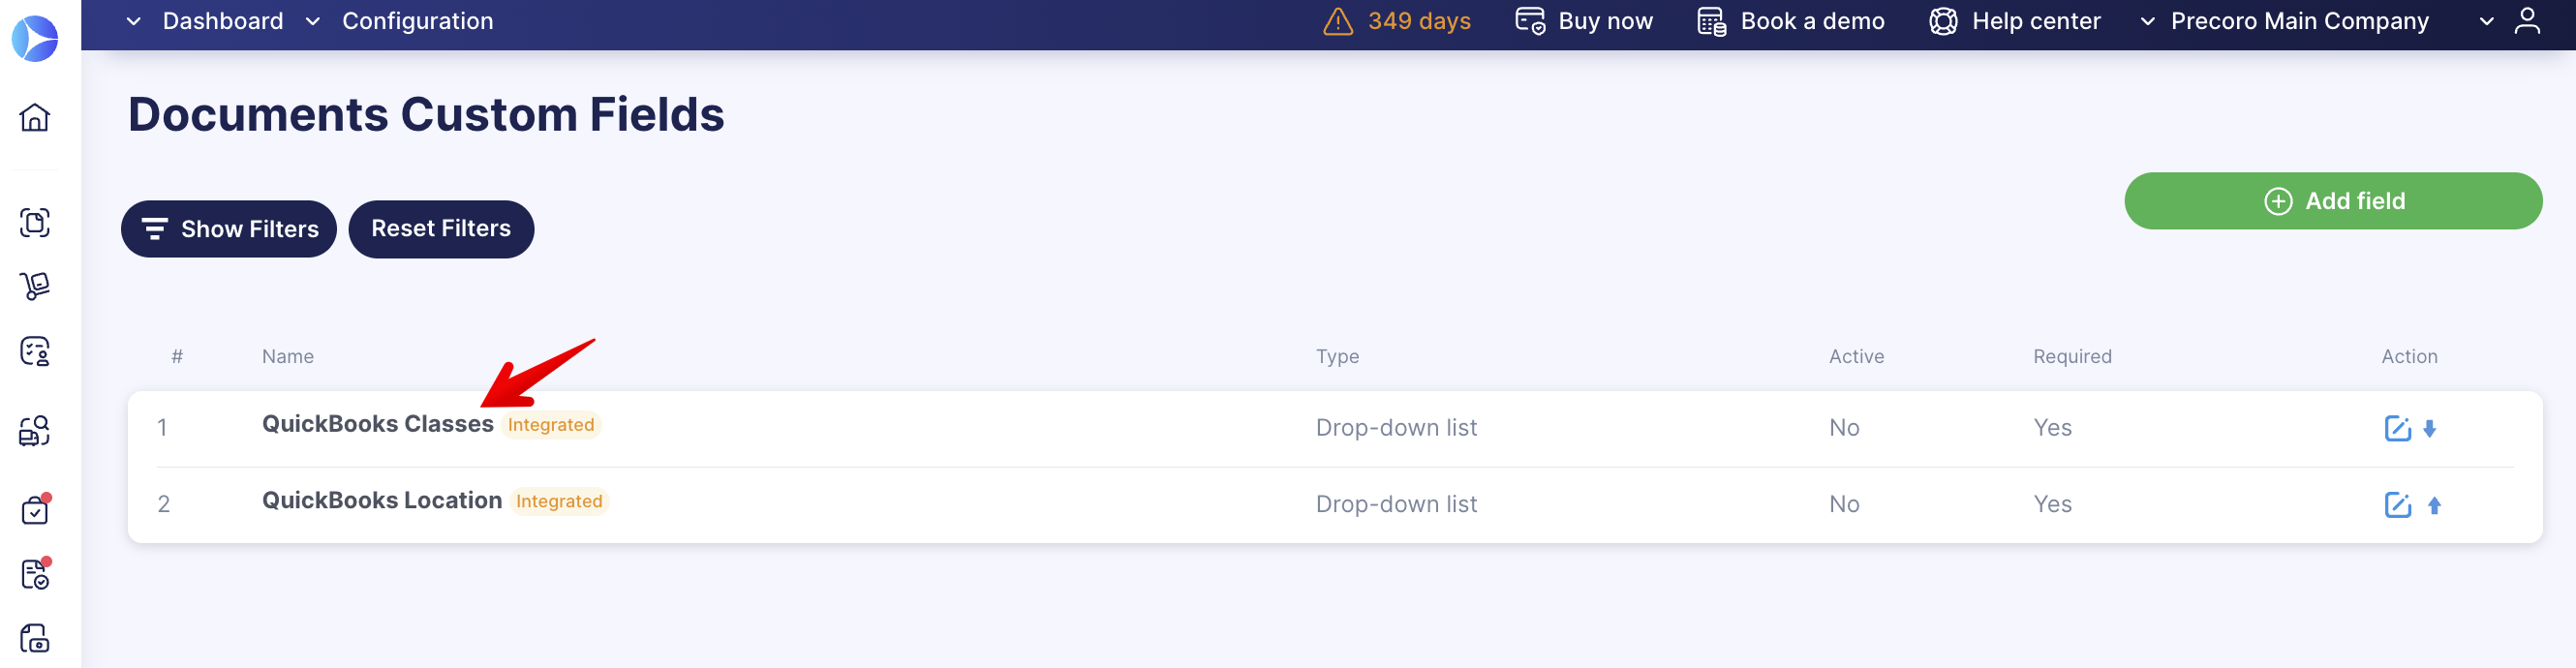
In QuickBooks, the Classes list of options can be found on the corresponding page.
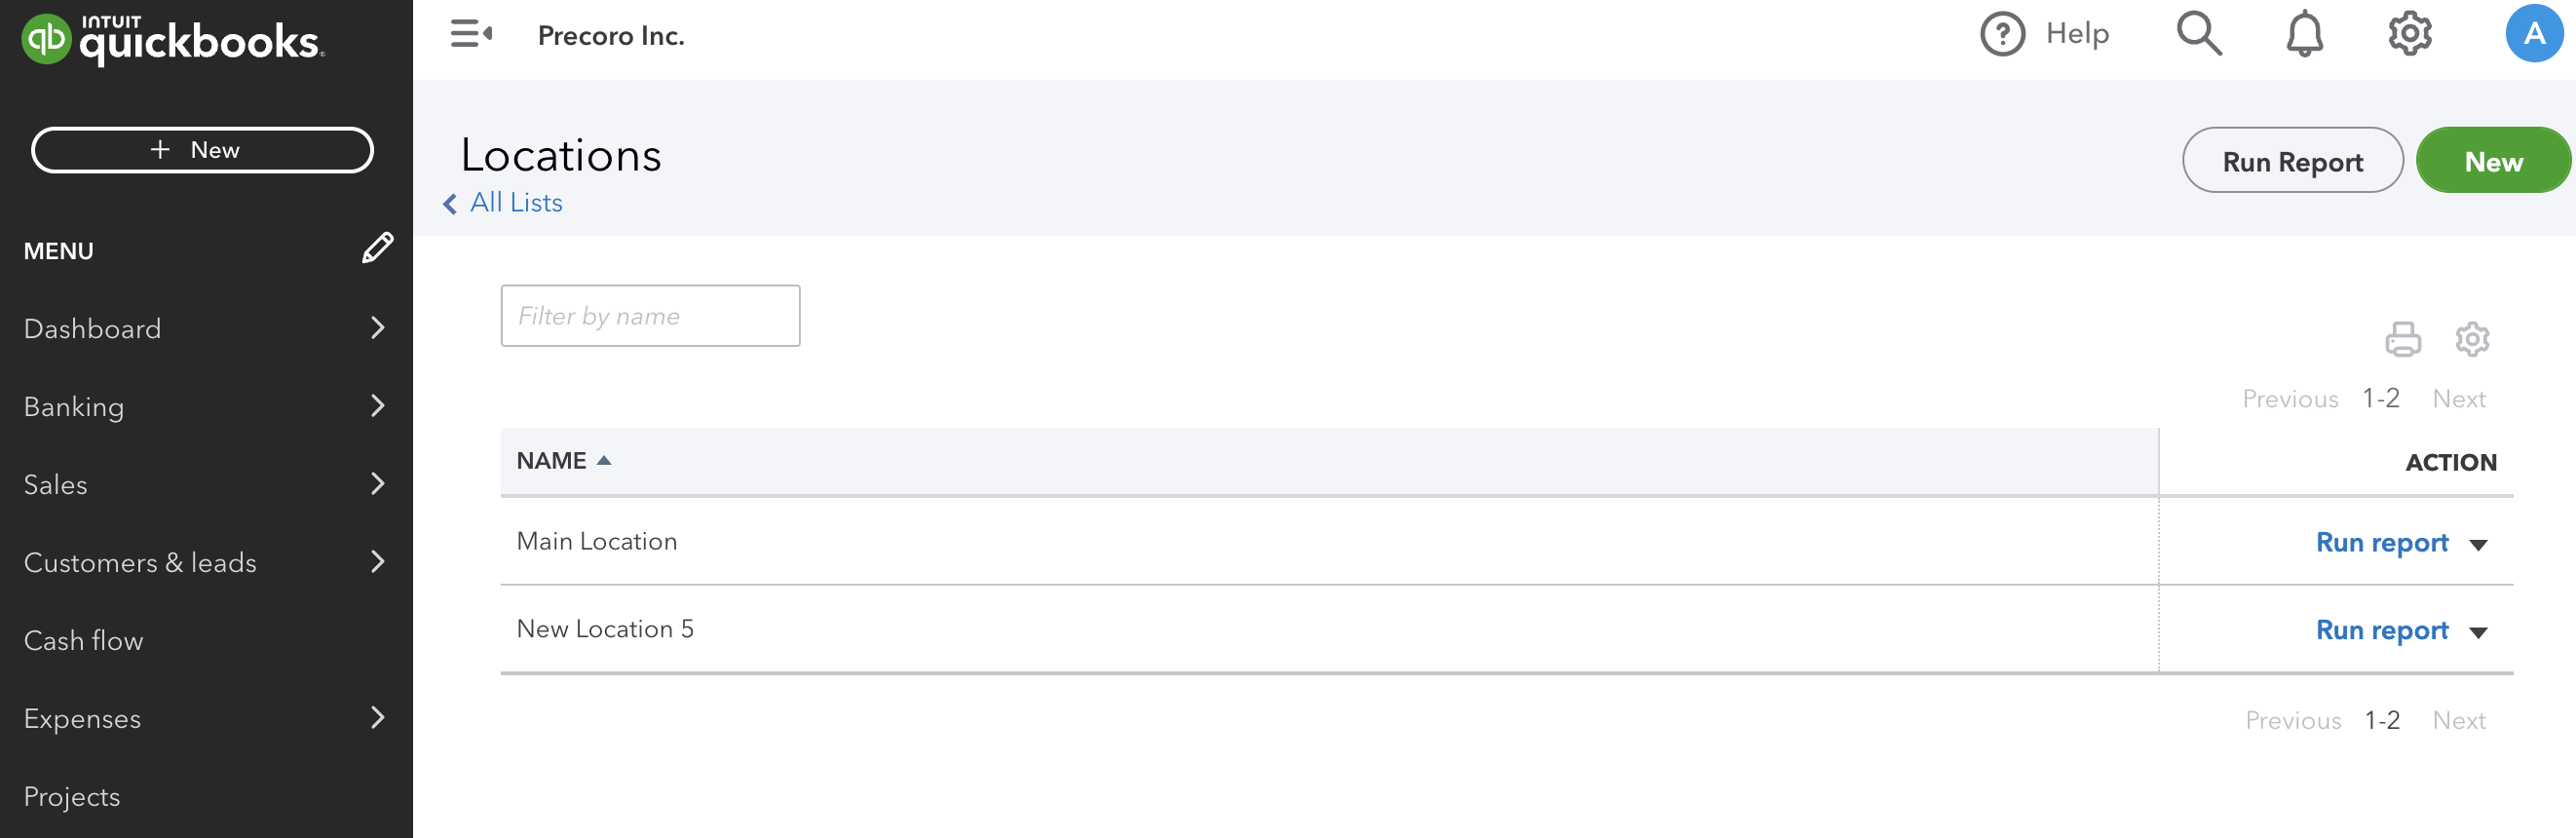
- Departments:
In Precoro, you will find the imported options in the automatically created directory QuickBooks Location in the Custom Fields for Documents.
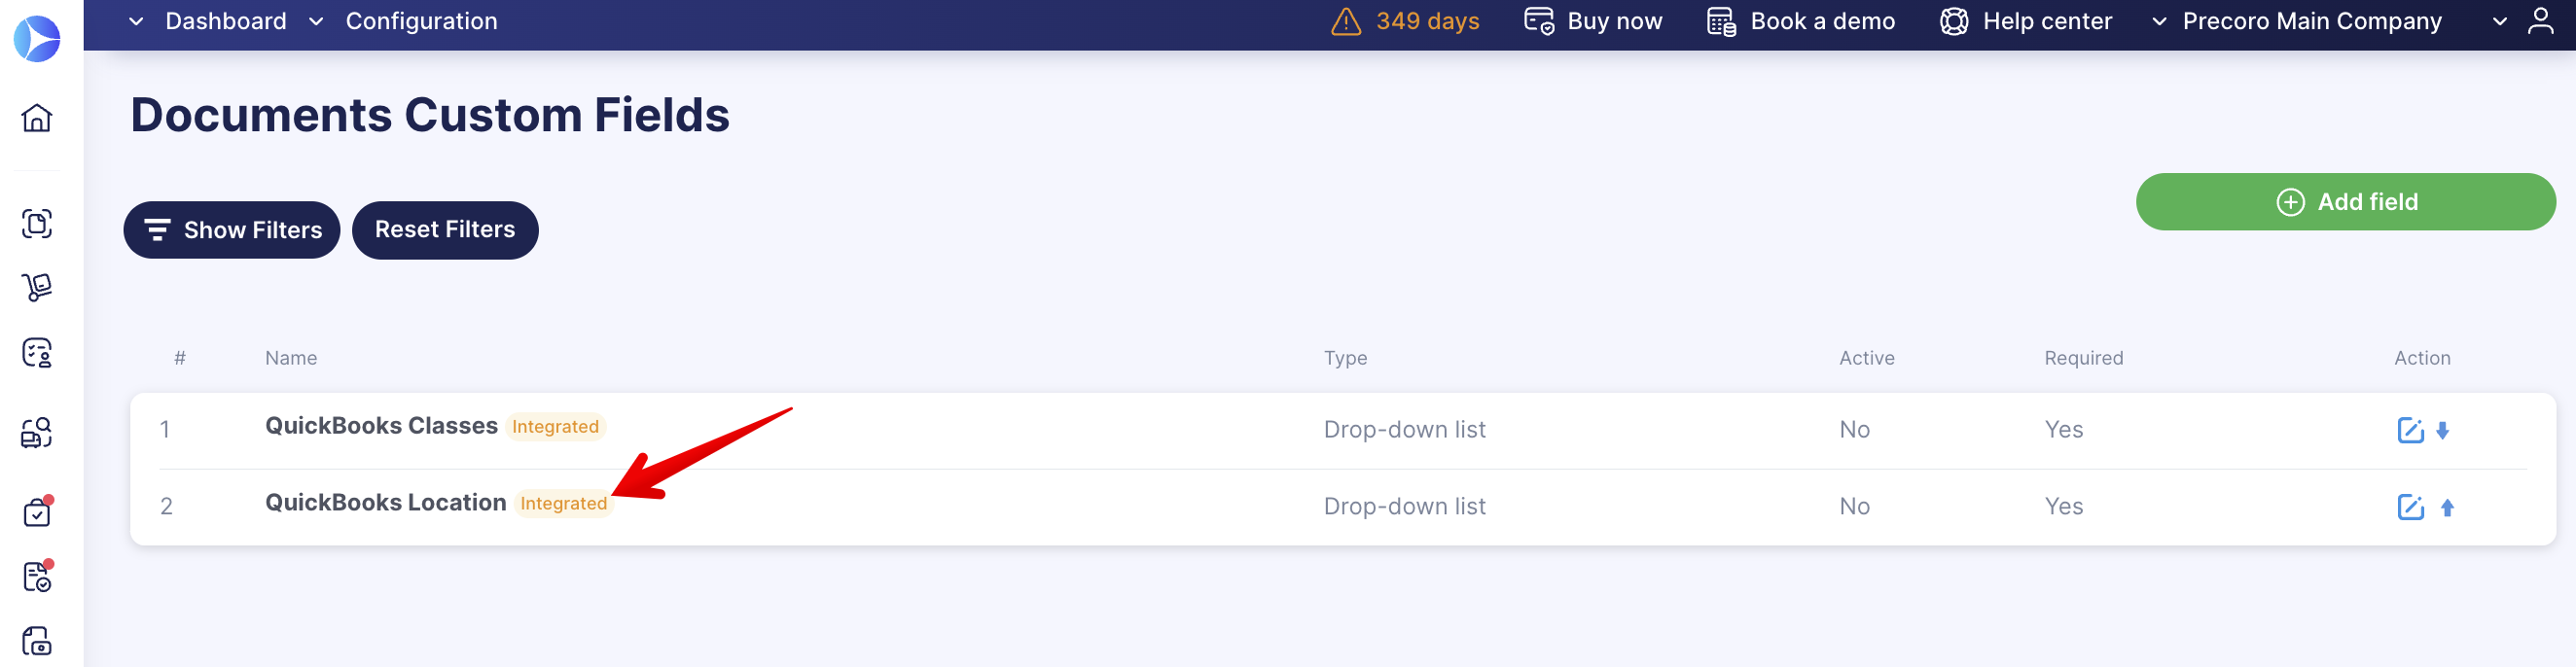
In QuickBooks, this list of options can be found on the Locations page.
- Customers (with Projects imported as sub-options):
In Precoro, you will find the imported options in the automatically created directory QuickBooks Customers in the Customs Fields for Items.
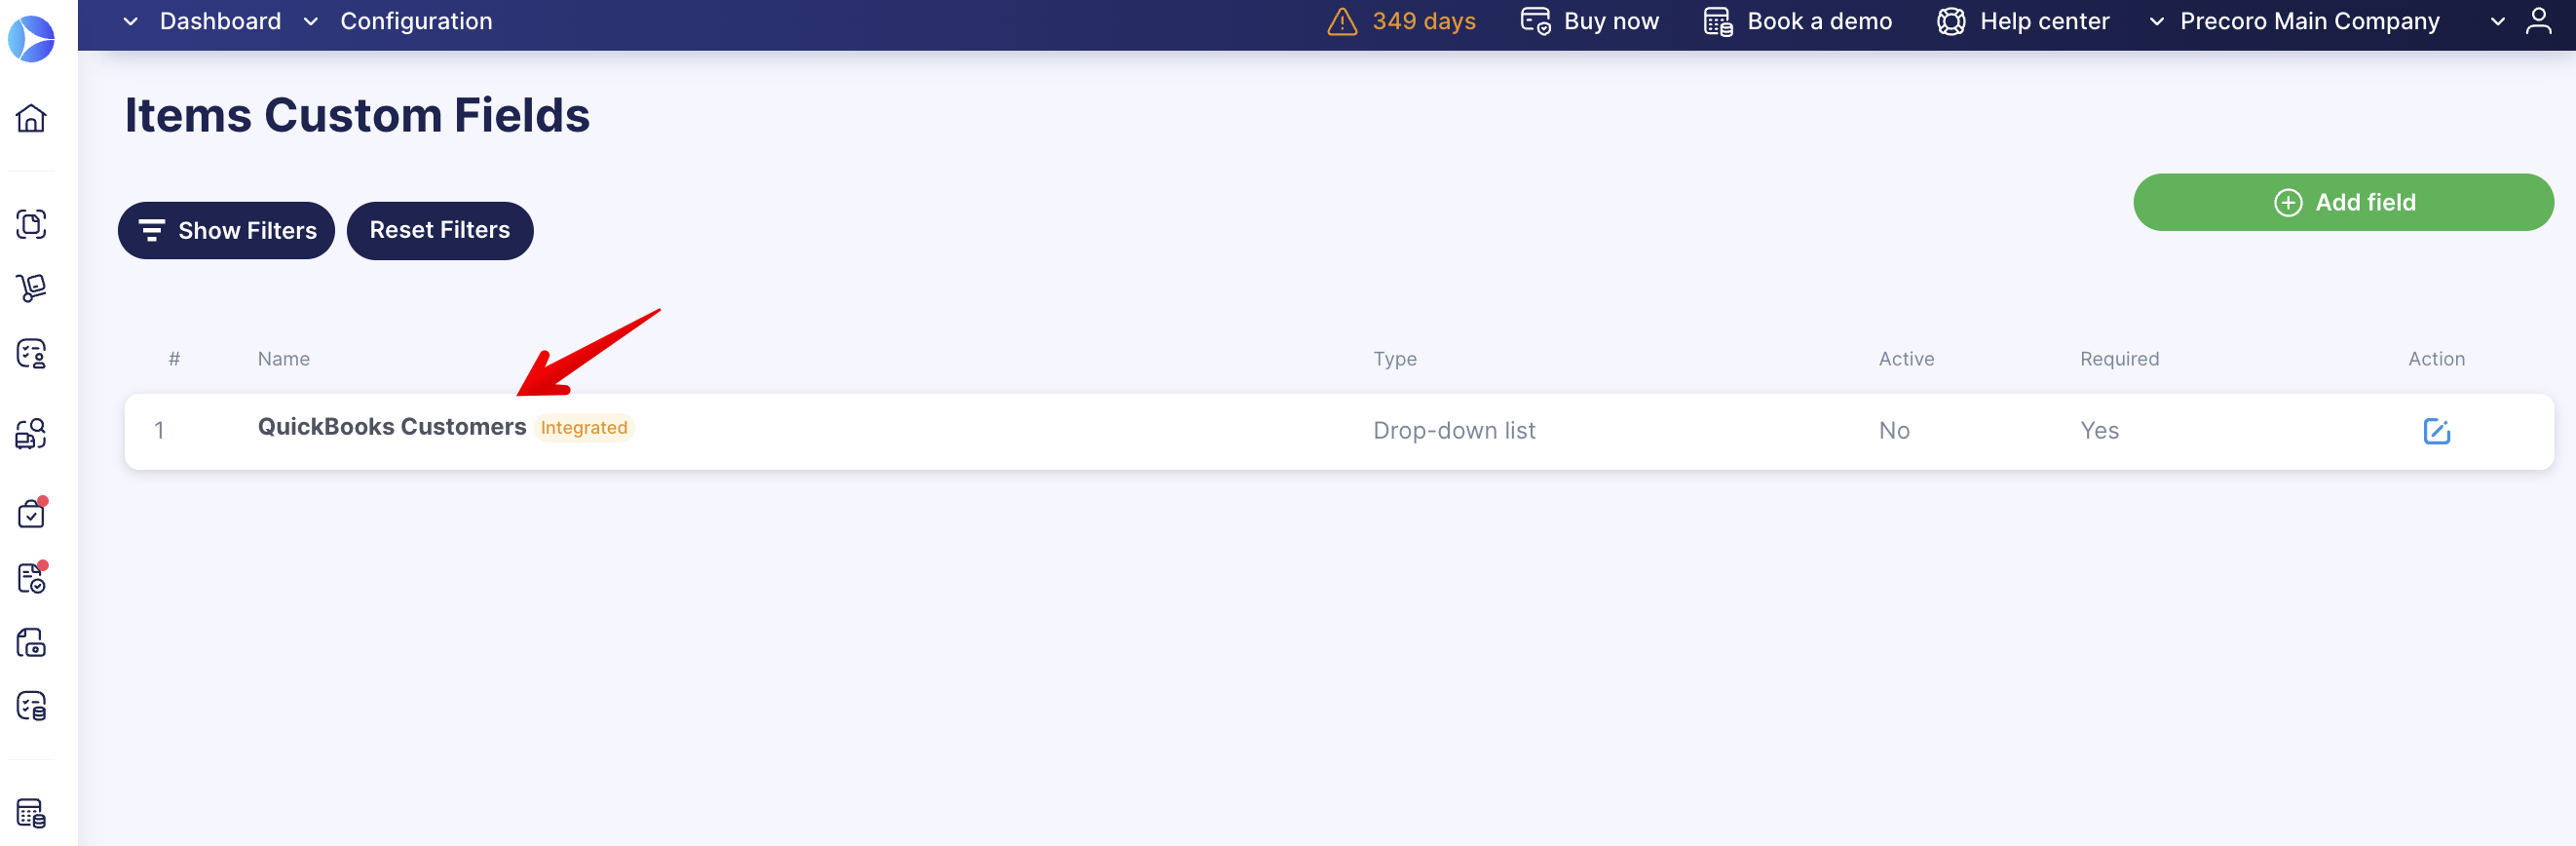
Projects that you input for Customers in QuickBooks will be imported as Customer sub-options.
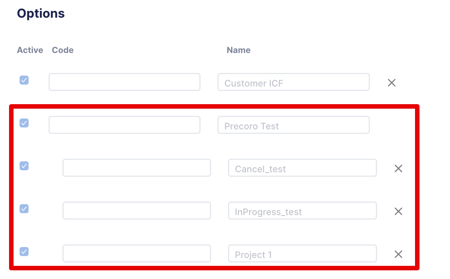
In QuickBooks, this list of options can be found on the Customers page along with the added Projects: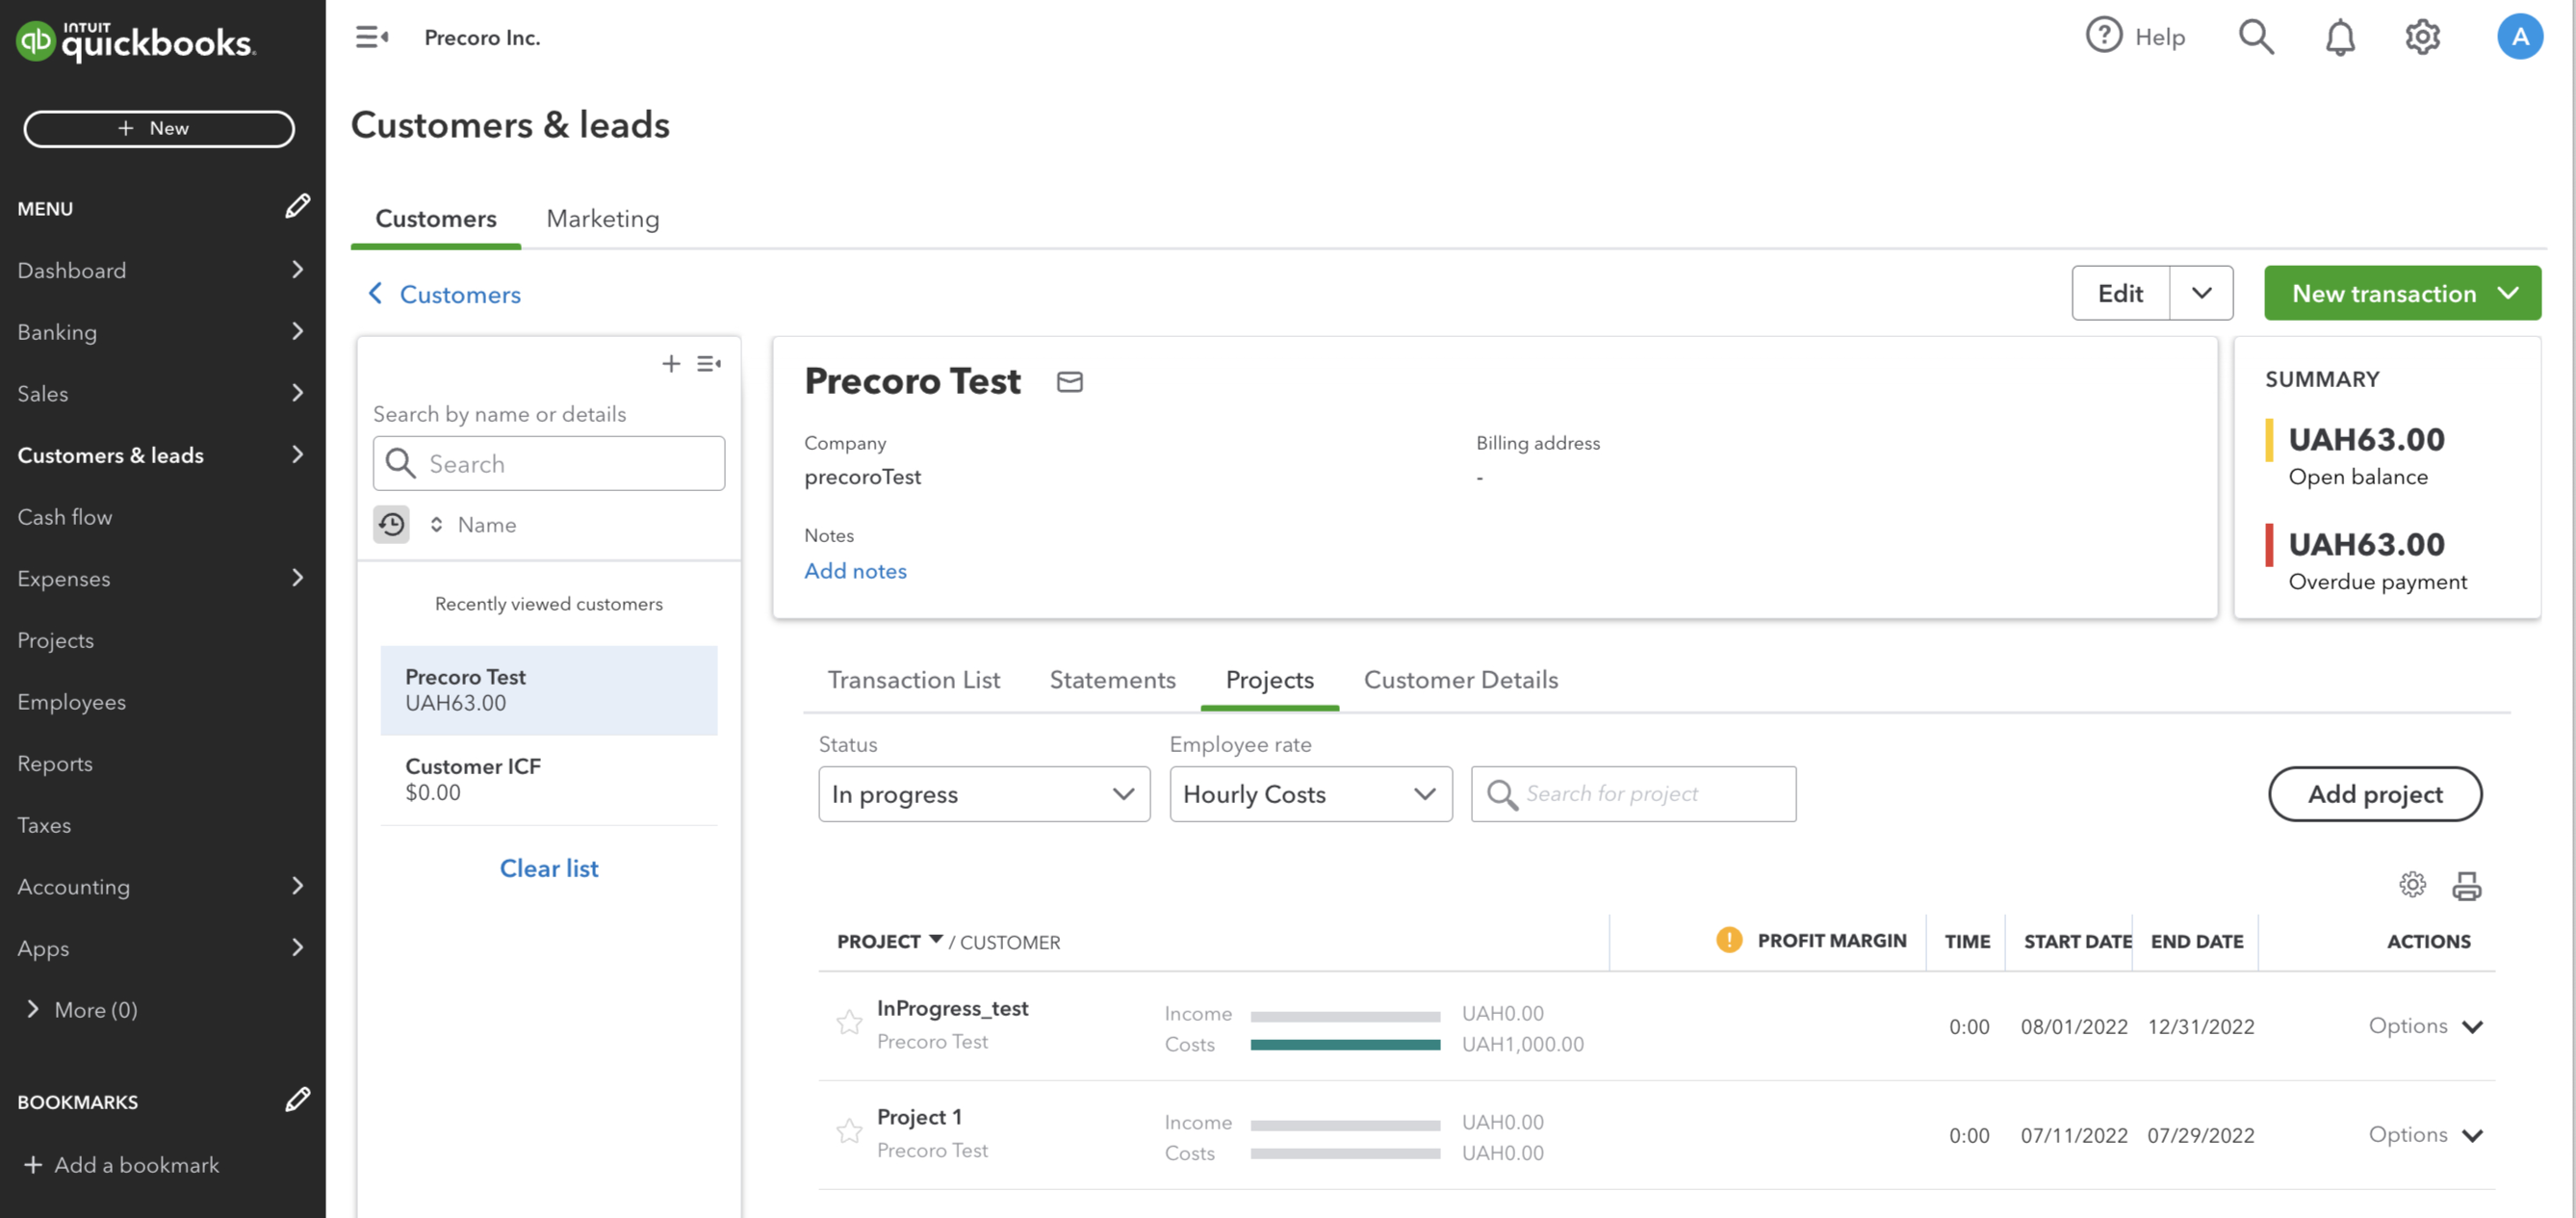
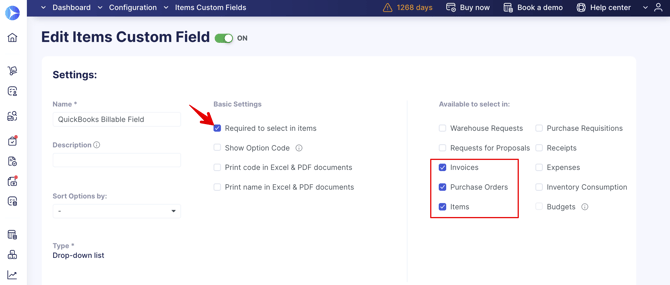
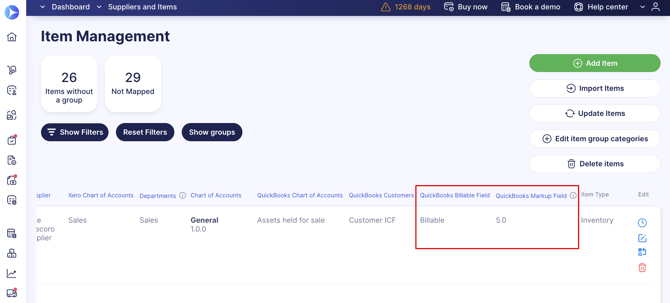
- Billable and Markup Fields:
In Precoro, you will find the imported options in the automatically created directories QuickBooks Billable Field and QuickBooks Markup Field in the Customs Fields for Items.
- The Markup Field amount is expressed as a percent of charges already entered in the current transaction. To enter a rate of 10% use 10.0, not 0.01.
- Billable Field is a drop-down type and holds three values: Billable, NonBillable, and HasBeenBilled.
Please note that by default it is set to be required in Items and available for selection in Purchase Orders and Invoices.
- Billable — expense is incurred on your customer’s behalf when you work for them. You can easily record and track billable expenses so your customer can reimburse them when they receive their invoice.
- NonBillable — charges are also called non-posting transactions because they are saved, but the transactions are not reflected on report totals. Also, they do not affect the customer’s Accounts Receivable balance.
- HasBeenBilled — the transaction has already been paid.
You can import items with the Billable Fields values to Precoro, add them to the document, and send it to QuickBooks. Thus, you will get a Billable value for your document items.
Importing Charts of Accounts with Account Codes
When importing the Chart of Accounts into Precoro, you can see field names and their code options. This can be helpful for large imports, especially when names in Precoro do not match those in QuickBooks.
Make sure to activate the Account Numbers fields in QuickBooks.
If the Account Numbers fields in QuickBooks are deactivated, this column will also not be displayed on Precoro import pages.
Open the Integration page and press the Import Chart of Accounts option:
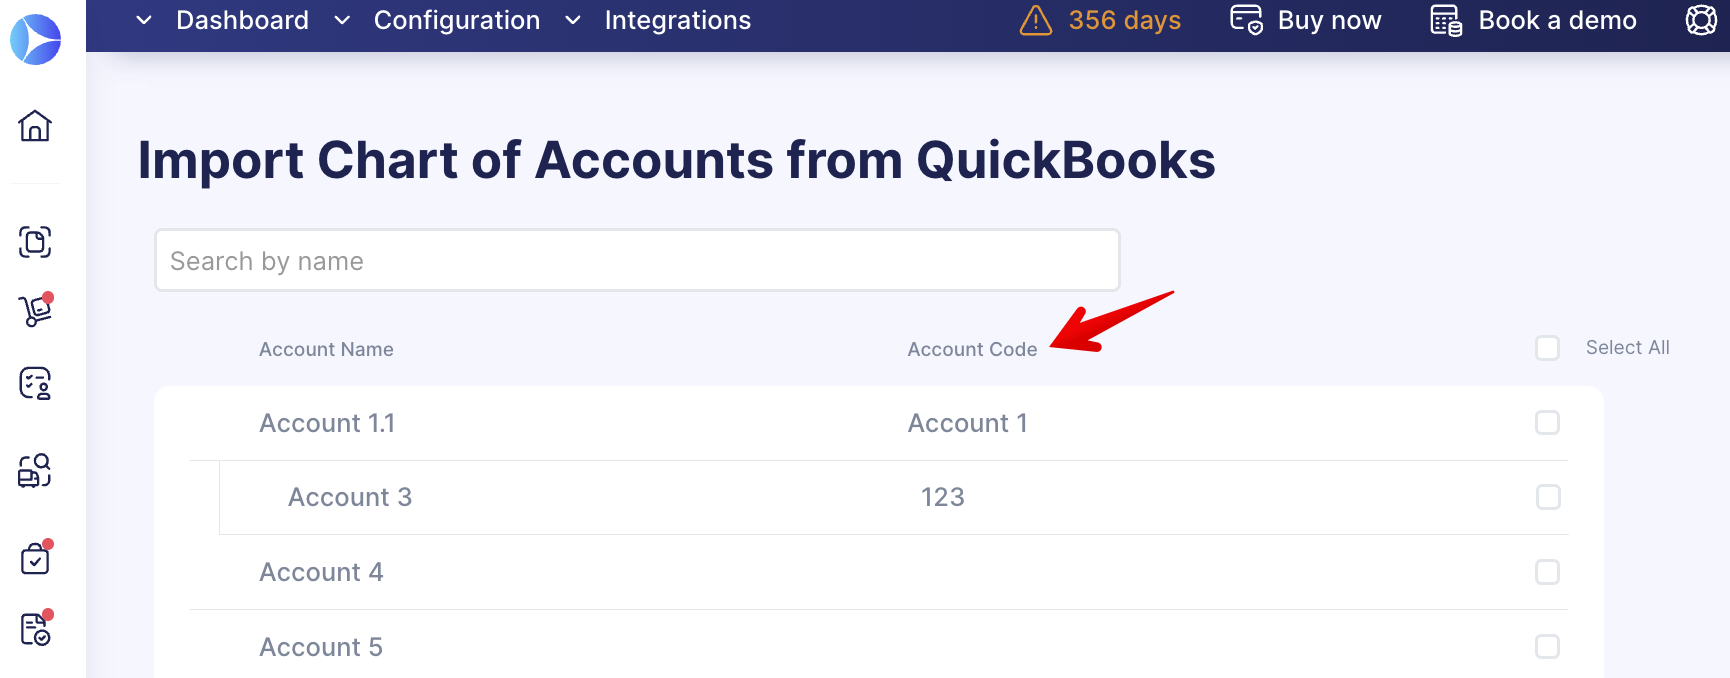
You can find more information on adding Account Codes to the Chart of Accounts field in Precoro here.
Please note that not all the Account types can be integrated with Precoro.
The Accounts payable (A/P) type of the Account is not supported in Precoro. Thus it will not be imported.
Updating Integrated Options with Precoro
If you have made the changes in QuickBooks, you can update the integrated lists to have them up-to-date in the two following ways:
Please note that in Precoro the Update button or Auto-Update toggle will only renew the integrated options.
1. Manually by clicking the Update button next to the needed option:

2. Using the Update Changes Automatically toggle:

If the toggle is activated for the option, the imported list will be automatically updated, based on the changes you have made in QuickBooks.
How to Deactivate Chart of Accounts, Classes, Customers, and Projects in Precoro
You can remove the integrated fields in the Custom Fields for Items by deactivating the whole directory. Switch the deactivation toggle on top of the page to OFF and press the Update button below.
You can deactivate the Chart of Accounts only if you do not use them in the Integration Settings.
The inactive Chart of Accounts, Classes, Customers, and Projects can be found using the filter.
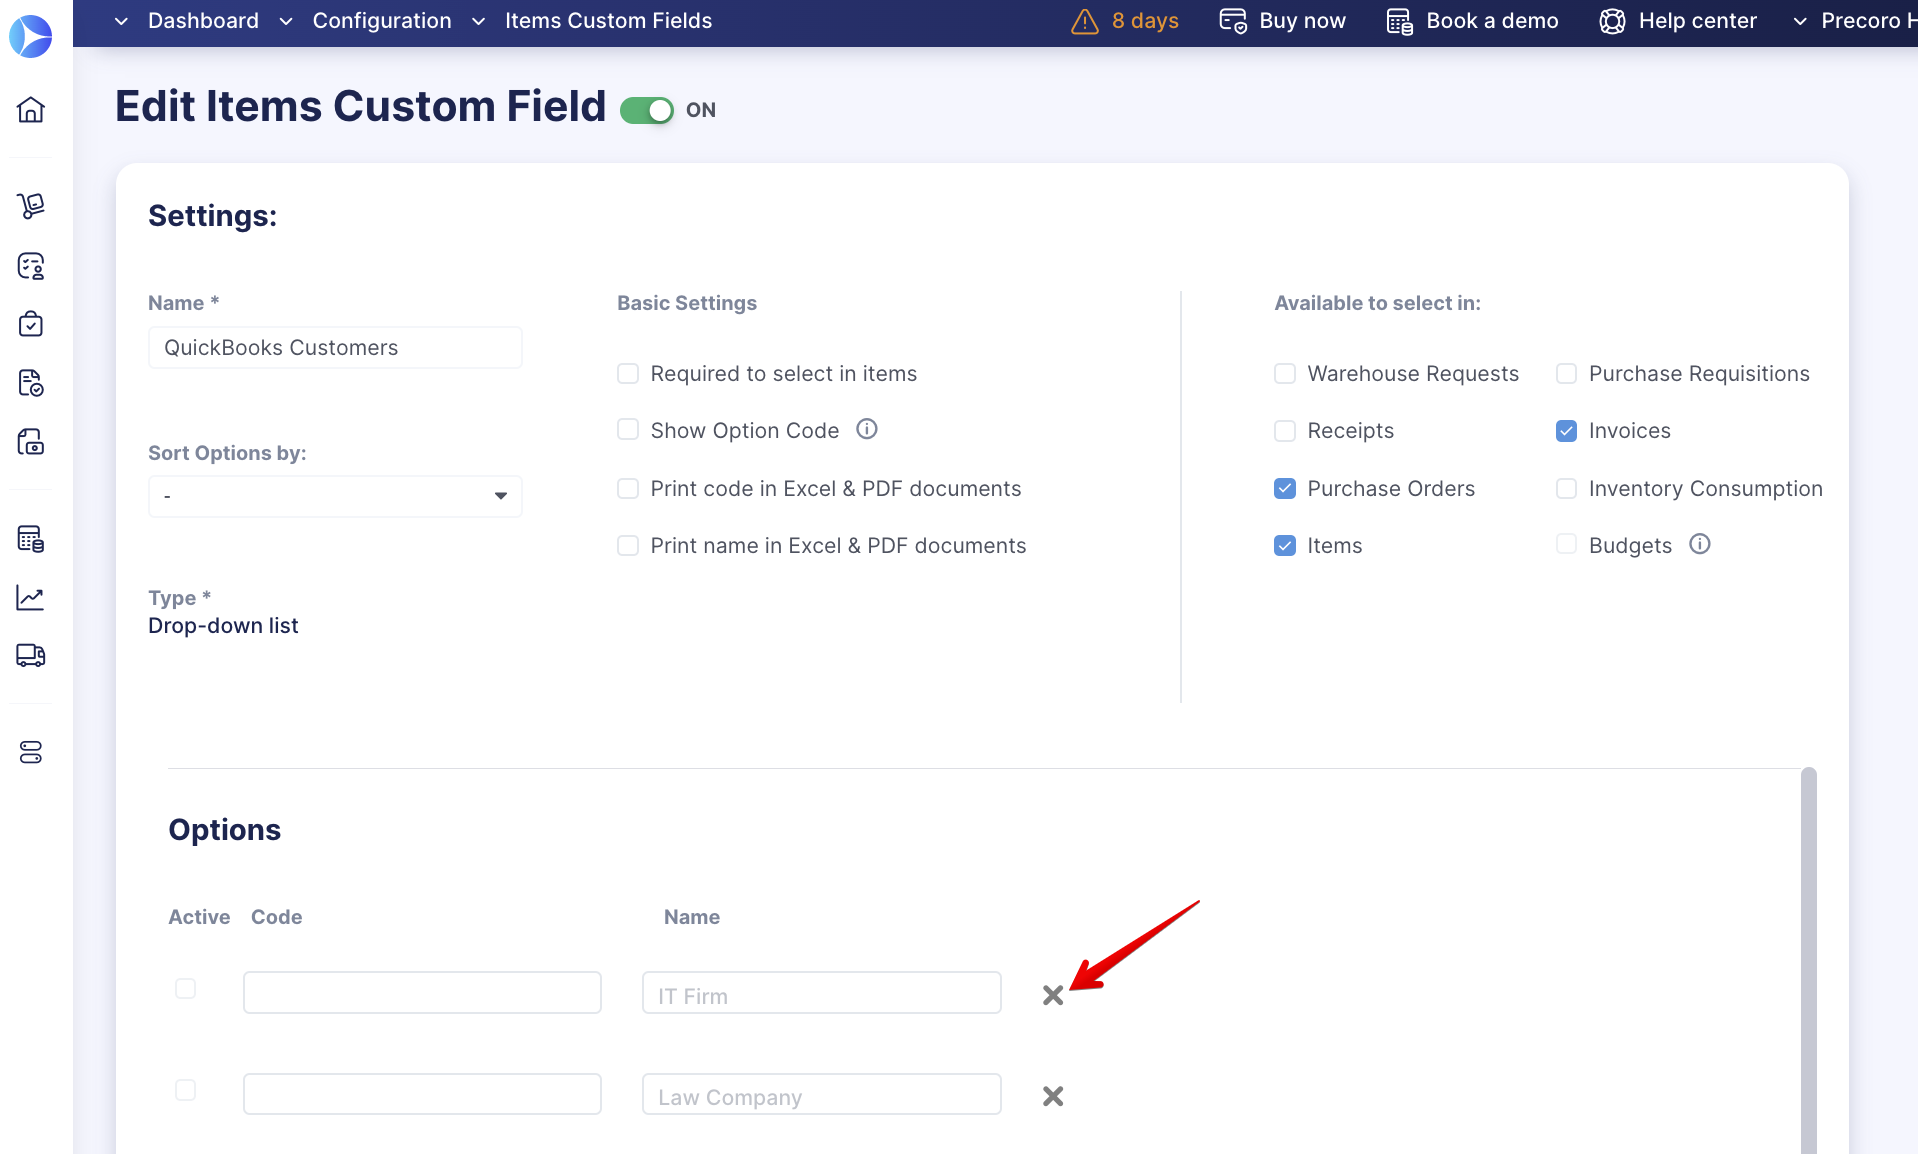
How to Delete the Integrated Options
You can delete the integrated options that are not needed in your procurement process.
On the Edit Custom Fields for Items page, click the cross sign near the necessary option. Press the Update button below once done.
Please note that those options that are in use cannot be deleted, you can deactivate this option without going through the steps below to delete it.
If you still want to proceed with deleting, follow these steps:
1. Go to the document list page where this custom field is used.
2. Apply filters to find the documents where the unnecessary option is used.
3. Revise the documents and replace the option with the new one.